Managed BYOD
Windows 11 Education Setup
The following guide will step you through how to set up a new Windows 11 Education (or Windows 11 Professional) device and enrol in the Managed BYOD.
Please note these devices are generally the ones purchased through an education portal with your school. If you have purchased your device through a retail outlet you will most likely have the Windows 11 Home version which you can find set up instructions for here.
If you are unsure which version of Windows you have, please check the documentation that came with your device or confirm with your place of purchase, if necessary, before proceeding.
Before you begin, please ensure you have the following:
- Your device with Windows 11 Education.
- A stable internet connection.
- Fully charged device and connection to power.
- Student’s school email address (firstname.lastname@mnstu.catholic.edu.au).
- Student’s school Password
- Note: If you are a new student within our diocese you will not be assigned a student email, username or password until your first day of attendance at school. Please wait until you receive this information before attempting to set up your device following these instructions.
Setting up a Managed Windows 11 Education Device
Follow the instructions or watch the video below to set up your new Windows 11 Education device and to enrol your device in CDMN’s device management platform, built on Microsoft Intune. You can also download a copy of the instructions here.
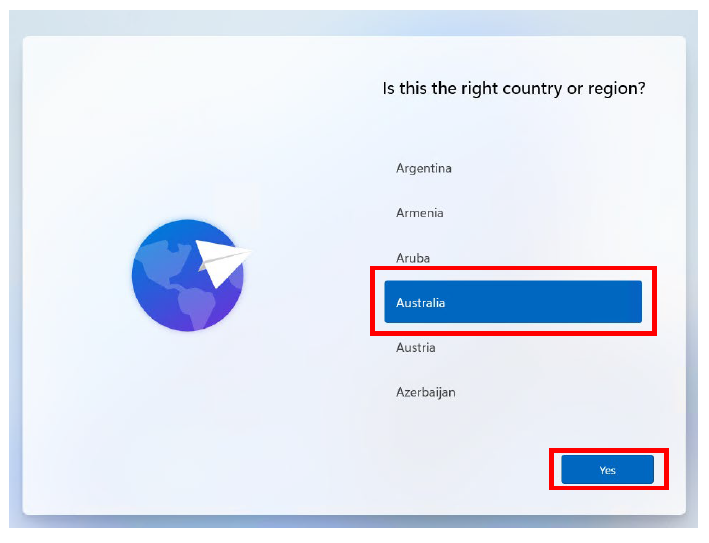
- When first setting up your new device, the following screen will be displayed. Select ‘Australia’ and then click ‘Yes’.
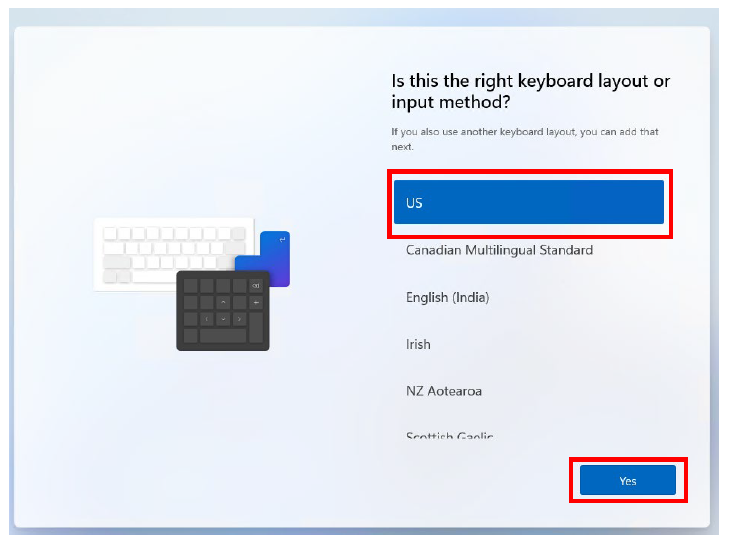
- Select ‘US’ as the keyboard layout and then click ‘Yes’.
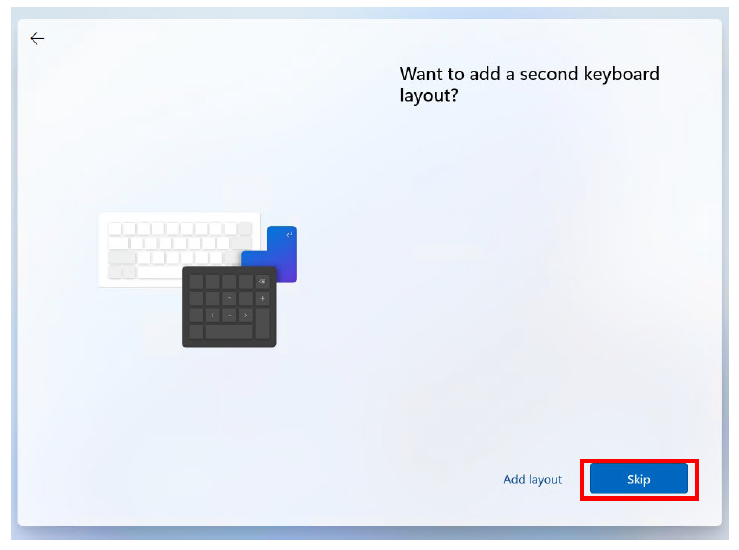
- When prompted to add a second keyboard layout simply click ‘Skip’ to continue.
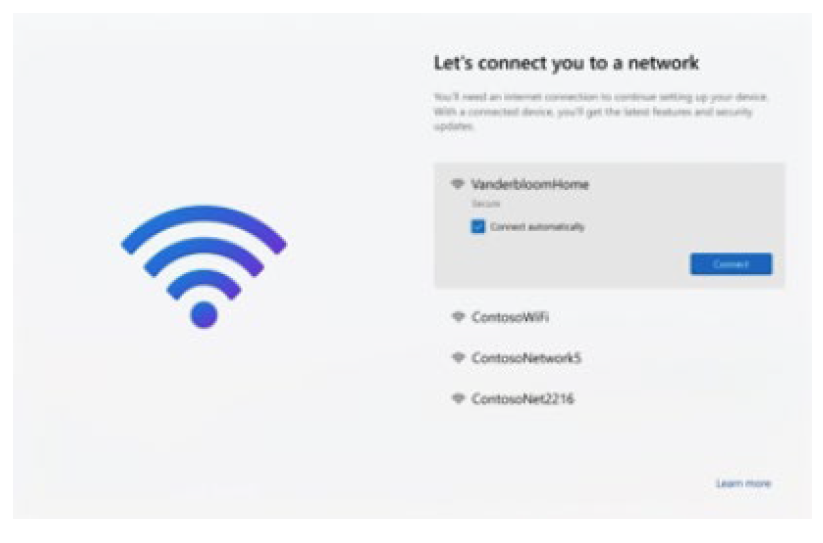
- You should then be prompted to connect to an available network. Select a known and trusted network from the list and click ‘Connect’. Enter the appropriate password when requested. Note: If your device is already connected to a cabled internet connection this screen will simply show the state of the connection (i.e. Connected, Internet). When you are connected to a network with Internet Access, click ‘Next’.
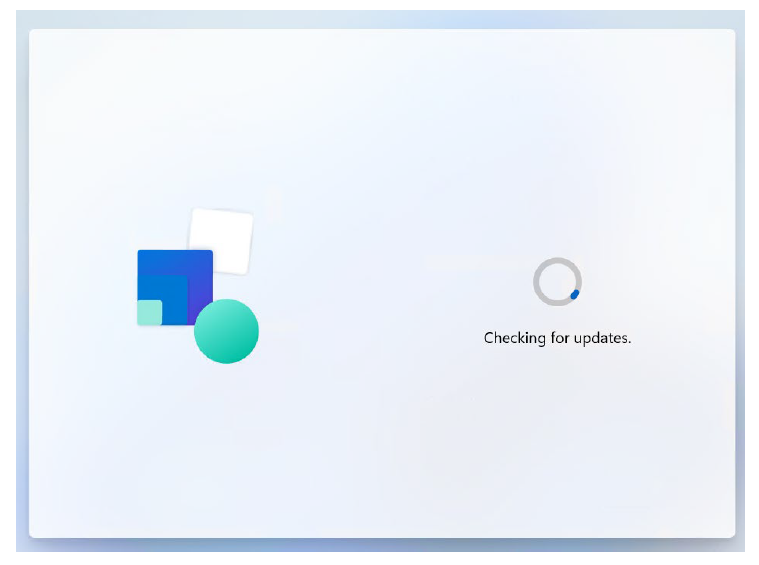
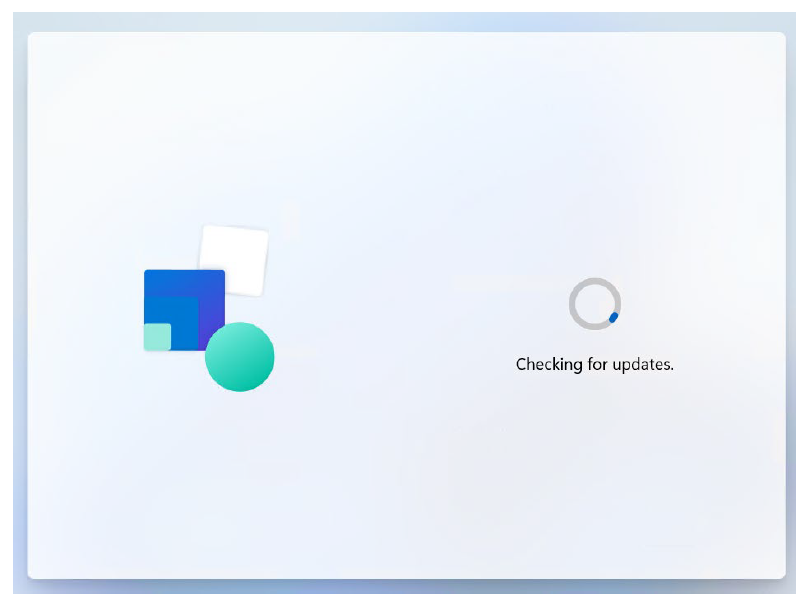
- The device will then check for updates, as shown below. DO NOT TURN OFF YOUR DEVICE during this process.This may take some time so ensure the device has power and watch for any prompts on screen.
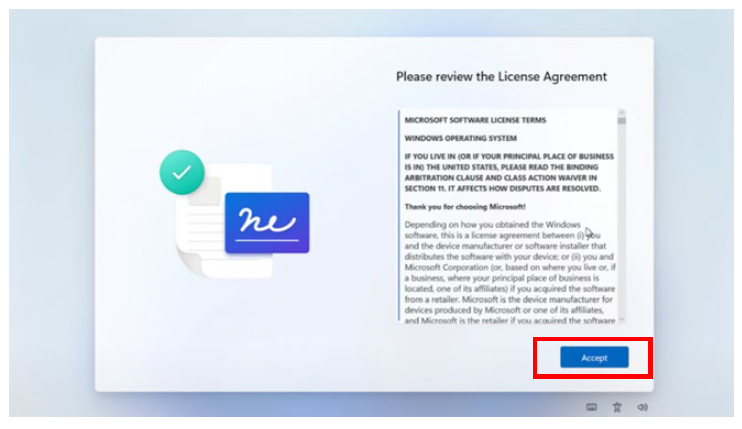
- Once the updates are applied you may be asked to accept the License Agreement. Read the agreement and click ‘Accept’.
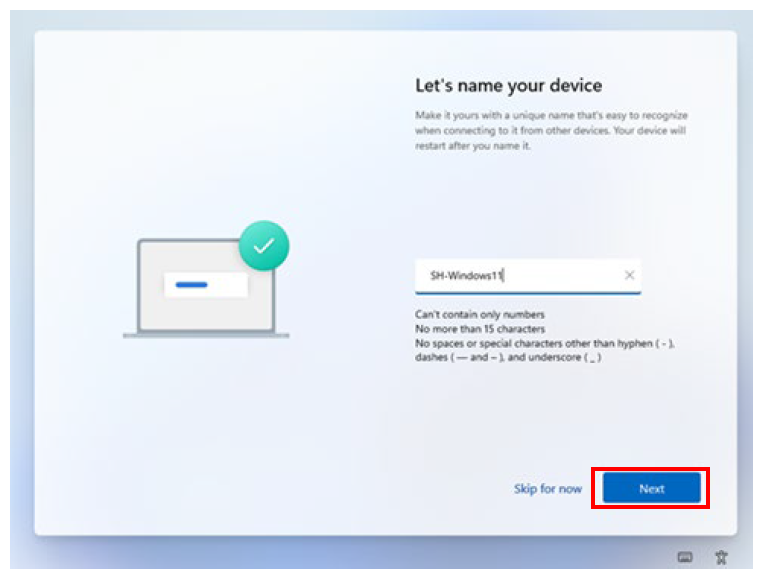
- You will then be asked to name your device. Choose an appropriate name that does not give away any personal information. Note the naming requirements displayed on screen. Also note that this will be the name that appears if you are sharing your screen with your classroom display. Name the device then click ‘Next’ to continue or choose to ‘skip for now’.
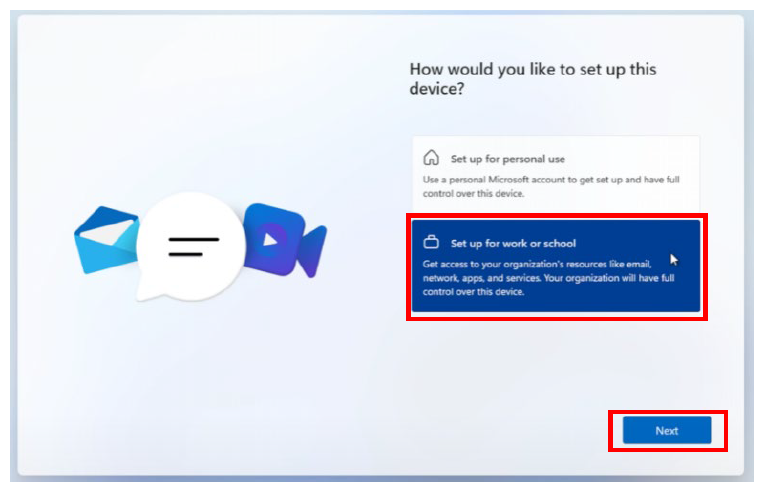
- You will now be asked to choose whether you would like to set up the device for personal use, school or work. Choose the ‘Set up for school or work’ option and then click ‘Next’ to continue.
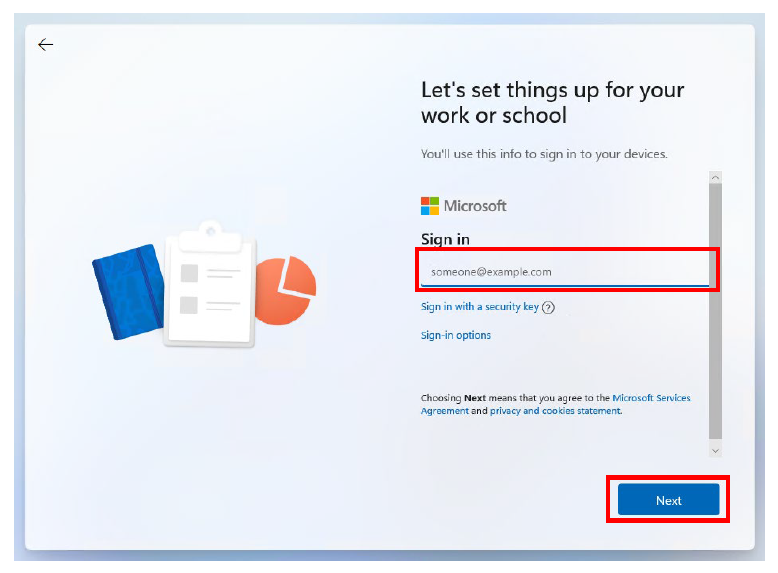
- The following screen will then be displayed. Enter your school e-mail address (usually this is: firstname.lastname@mnstu.catholic.edu.au) and click ‘Next‘.
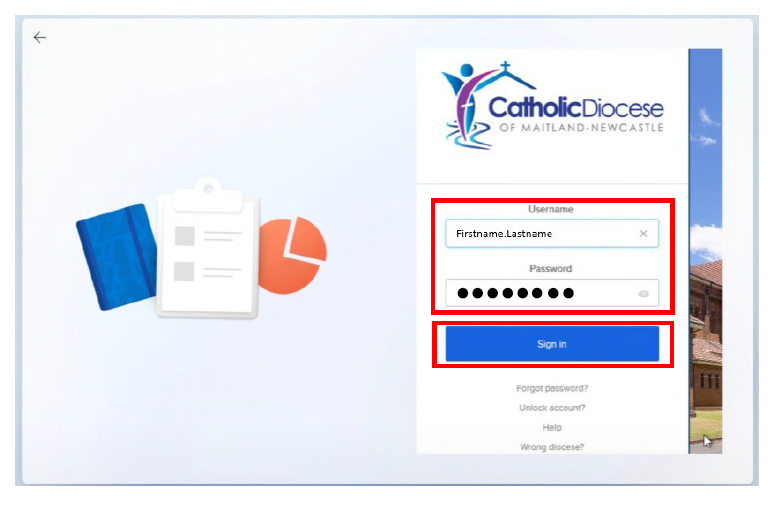
- At the following prompt, enter your school username (firstname.lastname) and school password. Then click ‘Sign In’.Note: Ensure that the ‘Diocese’ displayed is set to ‘Maitland-Newcastle’. If this is not the case, select ‘Wrong Diocese?’ from the options at the bottom and then select Maitland-Newcastle from the list.
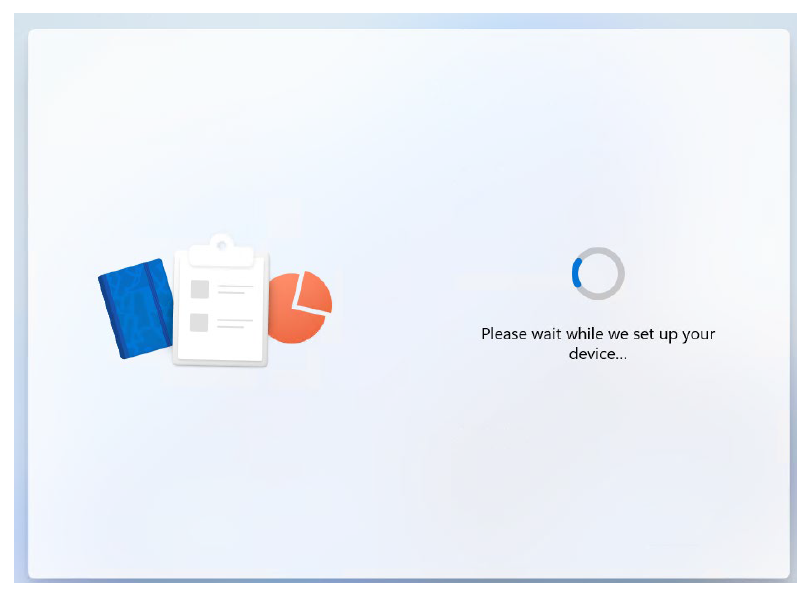
- The device will then be enrolled into the management platform. The following screen will be displayed.
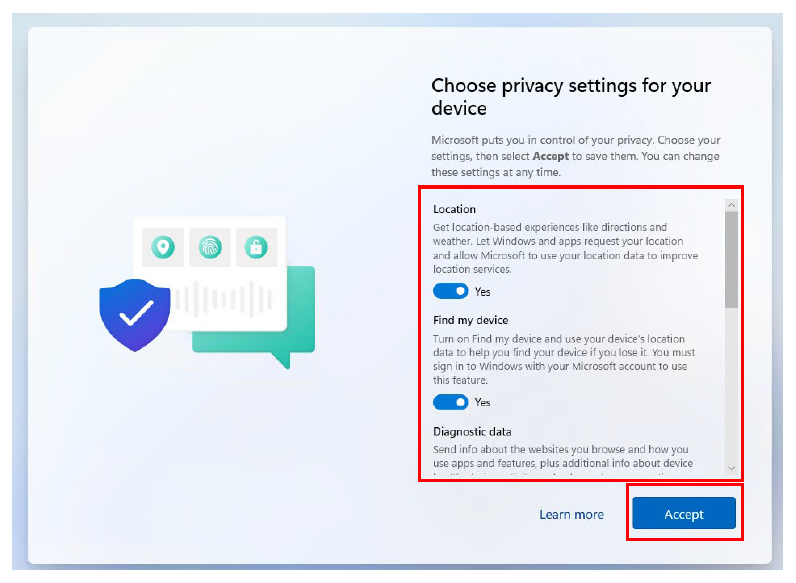
- Once enrolled, you will be prompted to select the privacy controls for your device. Select the options you feel are appropriate. CDMN advises that you leave ‘Location’ and ‘Find my device’ enabled. This allows your device to be located if it is lost or stolen. Be sure to scroll down the list of options. When satisfied, click ‘Accept’.
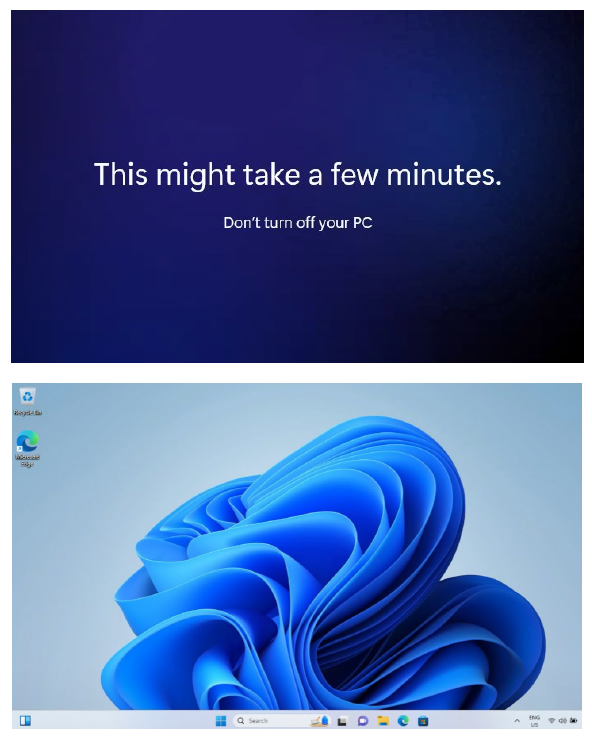
- The device will then check for updates, as shown below. Ensure your device has power and do not turn off your device during this time.
- The device will then complete the setup process and load to the desktop.
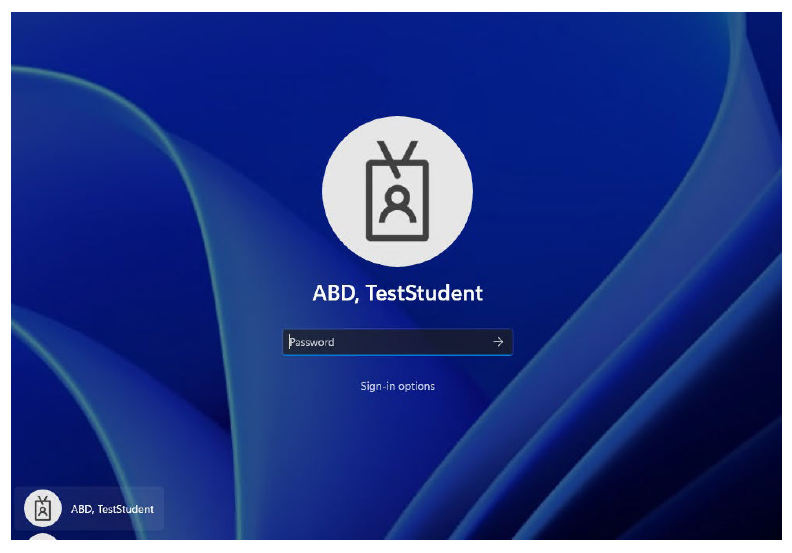
- The enrolment process is now complete, and your device is ready to use at School. When you next restart your device, sign in with your school user account (firstname.lastname@mnstu.catholic.edu.au) and school password.
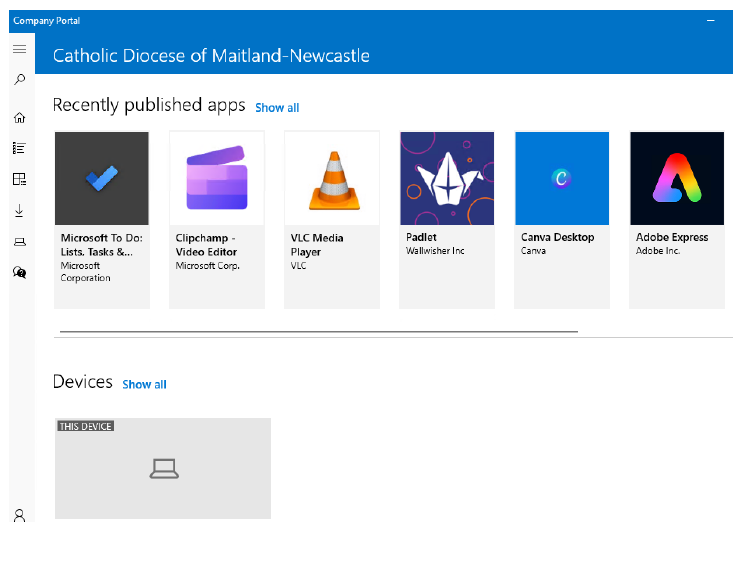
Accessing CDMN Applications
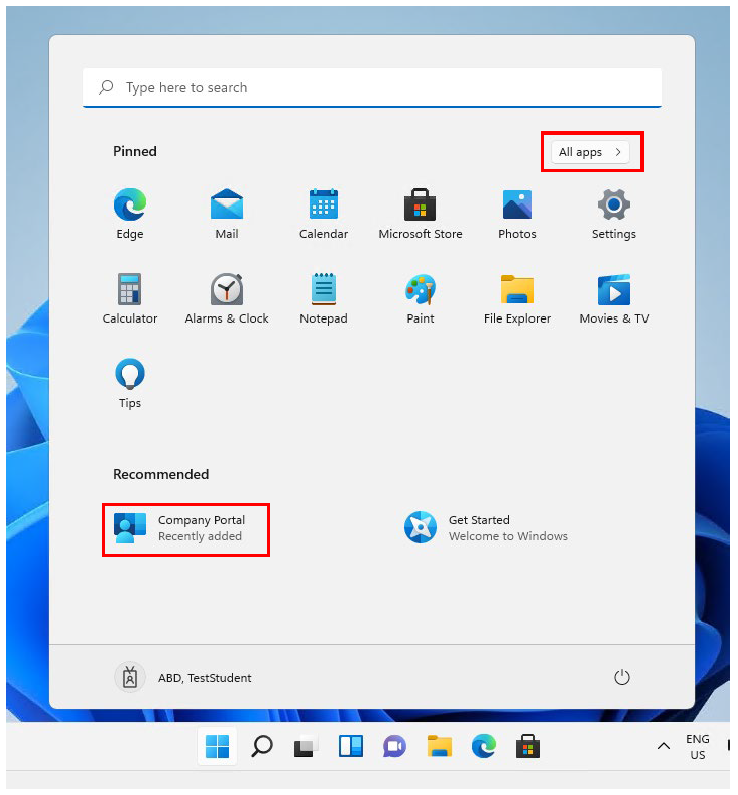
Now that your device is set up as a Manged BYOD, when you are logged in with your school account, relevant applications and device profiles will be installed as required. Additional apps may be made available for installation in the ‘Company Portal’. In most cases the portal will appear in the list of ‘Recommended’ applications. If this not the case, the click ‘All apps’ and select It from the list of installed applications.
It may take a few minutes for the Company Portal to be deployed to your device after the initial setup is complete.
You should now be able to see all apps available to you at your school in the Company Portal. Some applications will be automatically deployed to your device, as defined by your school.
Your student BYOD device is now completely setup and ready to use on the school network.
When you take your device into school you will select the wifi network called “CSMN” to connect to the school wifi.
Your school and teachers will provide any other specific information on how you will use your device in the classroom.